Chapter One
Defiers of Fate Edit
Edit
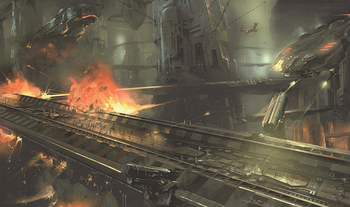
Purge TrainEdit
Wow, those are some pretty FMVs, we've come a long way from the 8-bit days. Do you think that chick pulling someMatrix shit might end up in our party? Too bad you can’t make her hang upside down from the ceiling while killing enemies. Time for some character intros, and then straight into a boss box. If you’re using Monobook, these intro boxes will look a little bit off since the text is so much smaller than the New Look. Everything else should look decent in either view.
| Character Intro- Lightning |
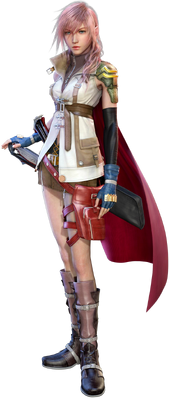 | Hey, a main character who isn’t a whining little boy with daddy issues (looking at you Tidus and Vaan). Light is a no-nonsense, battle hardened soldier. Like Lulu from FFX, she has no time coddle your fragile emotions and reassure you about your insecurities- she’s on a mission and won’t allow herself to be distracted. To some people she can come across as a total bitch, but she (along with Lulu) is one of my favorite FF characters. Despite the fact that they are females, I identify more with them than some of the epicene, head-case, emotionally confused male protagonists in the series. Oh yeah, and she punches Snow in the face not once, not twice, but three times! You have no idea how many times I wished someone would pop Rikku, Rinoa, or Selphie right in the mouth, so that scene where Light drops Snow twice within a few seconds was one of my favorite in the entire series. As far as gameplay goes, it’s hard to go wrong with Lightning. She isn’t the best at anything, but she’s good at pretty much everything, making her incredibly flexible and useful in all situations. Her Full ATB Skill, Army of One, does eleven physical attacks and can run up the enemy's stagger gauge in a hurry. Put her along with a physical attacker and a dedicated mage and you can take on anything. |
| Best Roles- | Ravager (full ATB skill), Commando |
| Character Intro- Sazh Katzroy |
| Sazh, in contrast to Lightning, is an easy-going, laid back character. He is also a dedicated father, which is one of his main motivations for continuing on the quest. His skill as a pilot comes in handy several times throughout the game. In battle, he may seem superfluous at first glance, with magic and physical attacks that are each overshadowed by three other party members, but don’t count him out just yet. He has some decent Synergist and Saboteur abilities, but his main asset is his unparalleled Blitz attack. Unlike other characters who just do area damage at a reduced rate compared to their single target attack, Sazh switches his pistols from semi to auto and empties his magazines into the enemy. This unleashes a potentially devastating barrage of bullets if you manage to hit with every shot. He sprays in a wide arc, but a group of enemies (or one big mofo like an oretoise) will take every last one. Sazh's full ATB skill, Cold Blood, hits the enemy 17 times, and just like Lightning's it can put a stagger gauge through the roof. I don’t use him much during the main storyline if I don’t have to, but don’t forget about him in postgame sidequests. By the way, there have been some, shall we say, interesting weapons in the history of the series, but Sazh combining two pistols to form an assault rifle is just mind-boggling. How does that make any sense? | 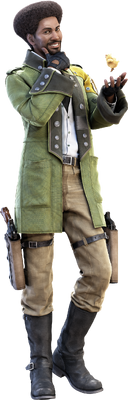 |
| Best Roles- | Commando, Ravager (full ATB skill), Synergist |
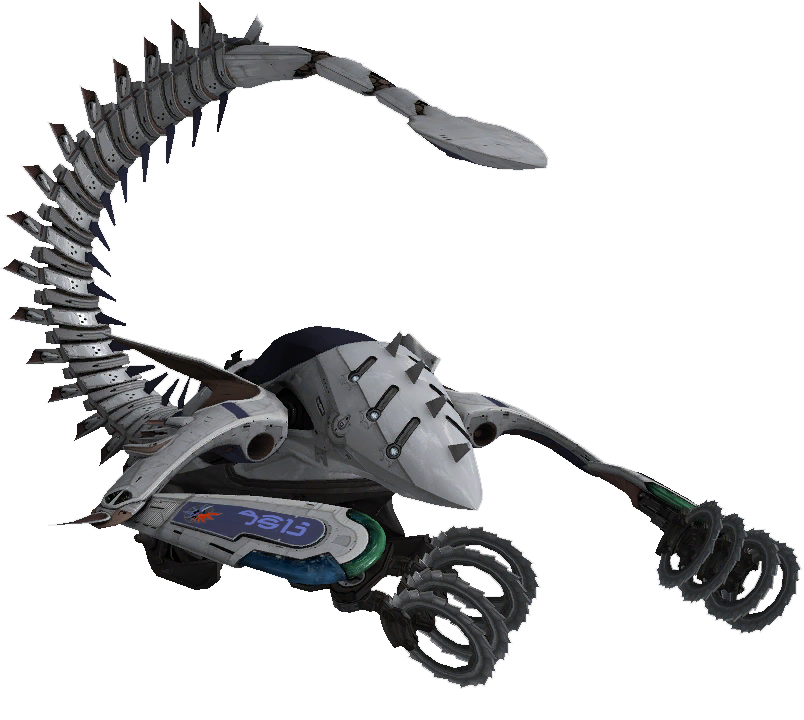
Boss Battle- Manasvin WarmechEdit
- "Run! I meant away!"
- —Sazh
| Manasvin Warmech |
|---|
 | |
|---|
| Statistics |
|---|
| HP | Stagger | Chain Res. |
|---|
| 360 / 990 | 300% | 0 | | Strength | Magic |
|---|
| 15 | 15 |
| |
| Strategy | | As the first battle of the game, this fight is nearly impossible to lose. If you've never played the game before, you may want to go through the tutorials when they're offered, but I'll be telling you everything you need to know. All you have to do here is just keep hitting the Confirm button to Auto Battle and he will go down quickly and painlessly. If you didn't read the intro page, you should notice now that your party is fully healed after battles. That's very nice in situations like this where you're immediately thrown into a second battle. The Warmech has triple the HP this time around, but he still isn't anything to worry about. Just keep attacking and you shouldn't even need to use any Potions. |
|
The Hanging Edge, The Restricted ZoneEdit
"Random" EncountersEdit
I’ll list the enemies encountered in each area for those of you care about getting 100% of the info in the enemy intel section, and I’ll warn you if you need to go out of your way to do it. In this chapter you will get all the info easily just by killing the enemies, so don‘t worry about it. If I don’t give any tips for the fight, just do the standard strategy (for now just Auto Battle). Whenever we come across an enemy for the first time, I’ll put it’s image up so you know exactly what I’m talking about.
Battle- PSICOM Warden x 2After this fight you will run into a dead end, but at the base of the wall is a little blue circle on the ground. Whenever you see this blue circle you can jump over the obstacle. Do so to move on.Battle- PSICOM Warden x 2
Battle- PSICOM Enforcer x 2, PSICOM Warden
Following this battle you will find the first treasure sphere of the game right in the middle of the path, containing a Potion.
Battle- Pantheron x 2, PSICOM WardenThese Pantherons will be the first enemies you Stagger, notice how much the damage goes up. After the battle go up the little staircase off to the side for a treasure of 2 Potions.Battle- PSICOM Enforcer, PSICOM Aerial Recon
After the battle you have to use the stairs to get around the barrier, don’t forget to pick up the Iron Bangle along the way. Put this on Lightning to give her a 50 HP boost. On the other side of the barrier is a treasure sphere with 50 Gil. Every little bit helps, I guess.
Battle- PSICOM Warden x 3Battle- PSICOM Warden, Pantheron
This battle begins with a tutorial about using Items during battle. I think you can figure this out on your own, and if you do it you are forced to use up one of your potions. You already have quite a few, but why throw one away?
Fields of WarEdit
Battle- Pantheron x 3, PSICOM Warden
You may actually need to use a Potion in this battle. Afterwards go up the stairs and jump across the blue circles to find a red circle. Examining these red circles always causes something to happen, in this case it’s a switch that activates the machine to take you to the next area.
“Hell’s not sounding too bad, this place ain’t exactly paradise”- SazhEdit
Boss Battle- PSICOM MarauderEdit
- "Great, the entire Army came out to play!"
- —Sazh
| PSICOM Marauder |
|---|
 | |
|---|
| Statistics |
|---|
| HP | Stagger | Chain Res. |
|---|
| 600 | 104% | 0 | | Strength | Magic |
|---|
| 20 | 19 |
| |
| Strategy | | This battle starts with a tutorial on chaining enemies, which you can skip because I told you everything you need to know. Focus on the Enforcers first, a couple of Blitz attacks should take them out very quickly. After they're down, just pound on the Marauder to get him staggered. If he focuses all of his attacks on one character you will need to use a Potion, but if he switches to the other party member for a while you might not. Nothing too difficult. |
|


